Before we dive in, you need to do some homework. There is a small list of things you will need to check off to repeat the outlined steps in this guide.
- You’re going to need to be able to fund the project. You can support the project with enough Azure subscription credits to host the virtual machine resources (TIP: If you don’t have access to a subscription, you can sign up for a free account here. You will need a valid phone number and credit card as Microsoft uses these for identity verification.
- You will need access to your Azure Active Directory.
- You will need access to a user account that has Global Administrator access to Office 365, and owner role on the Azure subscription.
- You need to download and install the Windows Virtual Desktop cmdlets for Windows PowerShell on a Windows 10 machine. These cmdlets are what allow you to do the “actual work” we’ll perform later.
- Traditional Active Directory controls WVD. You can use your existing AD, or you can make a new domain controller in Azure… as if it was sitting in your datacenter. So you’ll need domain admin access to your on-prem AD, or, use this guide to make your own DC in Azure.
So you may have a few things to do until the next leg of the journey. Once you’ve completed your homework, we will roll up our sleeves and begin the initial WVD setup by completing the early configuration steps.
Setup and Registration
So let’s get this party started and set out deploying WVD. These initial steps are quick and easy.
You first have to grant consent on behalf of your organization.
Consent, and Permissions
Step 1: Log in
Log in to your Azure Subscription with your global administrator account.
Step 2: Provide Consent
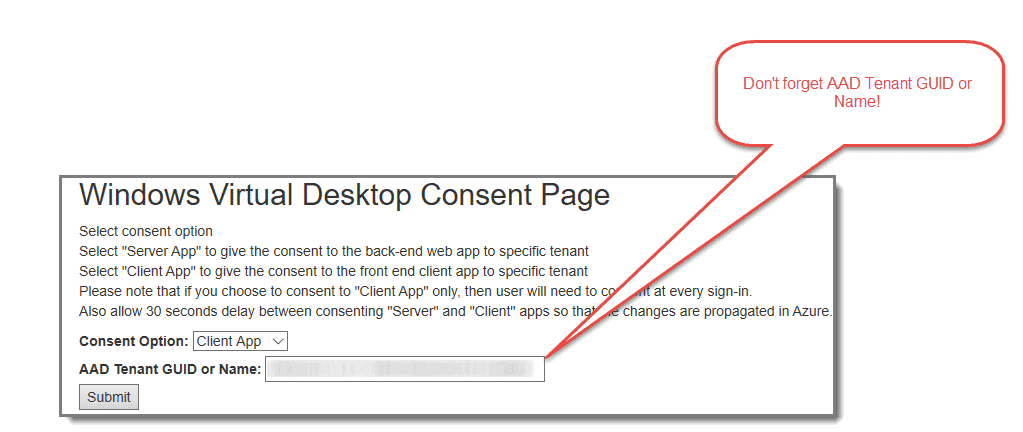
Then open another tab in your web browser and visit the Windows Virtual Desktop Consent Page (https://rdweb.wvd.microsoft.com/).
- Start with the “Consent Option” set to “Server App,” then fill in your “AAD Tenant GUID or name” and hit submit. The Consent page explains what you agree to, as is shown below.

- The GUID is your Azure domain name. The tenant ID is a long alphanumeric identifier that is nearly impossible to remember but easy to look up in your Azure portal.
- Note: You can find your “AAD Tenant GUID or name” by visiting this link: https://portal.azure.com/#blade/Microsoft_AAD_IAM/ActiveDirectoryMenuBlade/Properties
- If there is nothing at that link, then you don’t have an active subscription, sign up at https://azure.microsoft.com/en-us/free/ to get a free one if needed.
Step 3: Accept Permissions
Microsoft will then ask you to accept permissions needed by Windows Virtual Desktop, hit “Accept” when prompted to grant access.
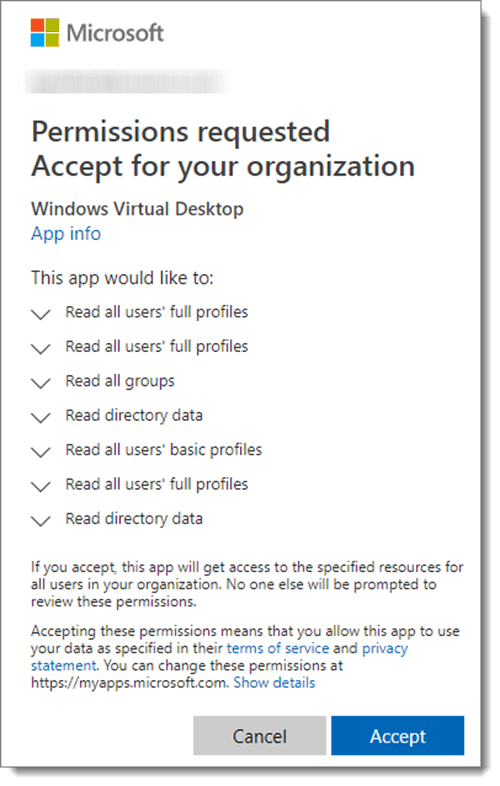
If done correctly, you’ll see the following confirmation:

Next is a rinse and repeat type of process, as we have to repeat the same series of steps except for this time, we choose the Client App.
Step 4: Provide Consent
After a comfortable 30-second wait as suggested, repeat the previous steps and set the “Consent Option” to “Client App,” then fill in your “AAD Tenant GUID or name” and hit submit.
Step 5: Accept Permissions
Once again, Microsoft will then ask you to accept permissions needed by Windows Virtual Desktop Client, hit “Accept” when prompted to grant access.
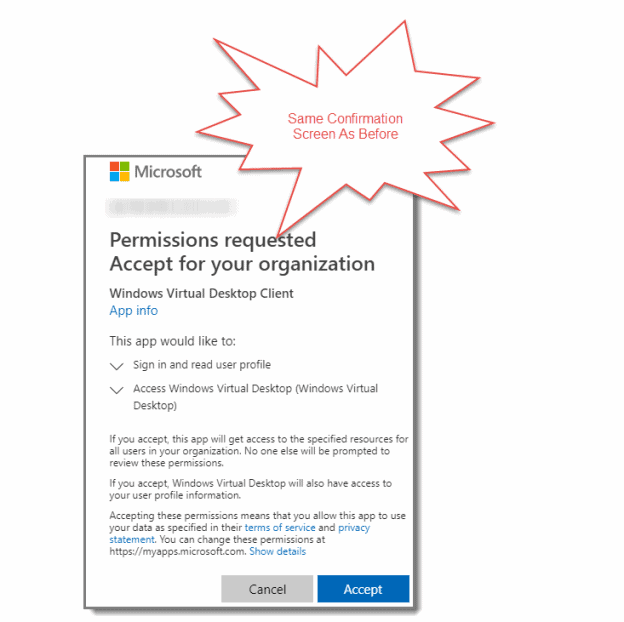
Once again, this is followed by a confirmation of your registration.

Assigning Users and Administrators
Step 1: Assign Enterprise Application Administrators
The next step is to Configure Enterprise Application Administrators in Azure AD to grant at least one of your accounts permission to create the Windows Virtual Desktop tenant. Either open “Azure Active Directory” and click on “Enterprise Applications,” or visit this blade in your Azure Portal: https://portal.azure.com/#blade/Microsoft_AAD_IAM/StartboardApplicationsMenuBlade/AllApps/menuId/

Step 2: Go to Windows Virtual Desktop
Next, click on “Windows Virtual Desktop.” You can search for it if it is not visible.

Step 3: Select Users and Groups
Select “Users and Groups,” then click on “Add User.”

Step 4: Assign Users
Search for, then select the user you would like to grant permission to create Windows Virtual Tenants to, and then click “Assign.”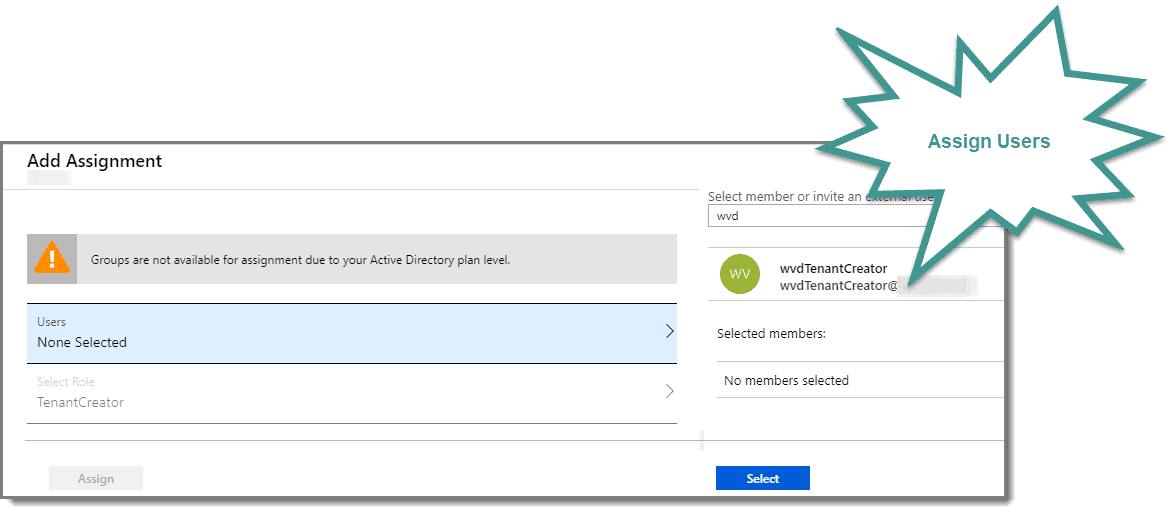
Step 5: Confirm Results
The result should look similar to below
Next, we will have a few more initial steps to go through, and then we will dip our toes in the water and initiate our first PowerShell scripts required for this process.
Part 3: Prepping Your WVD Environment
Finding Your Azure Subscription ID and AD Tenant ID
Before we create our VM environment, we have to wrap up a few more initial steps:
- Your Azure Active Directory tenant ID (or Directory ID)
- Your Azure subscription ID
You can find the Active Directory tenant ID (or Directory ID) in the Azure Portal by selecting “Azure Active Directory,” then clicking on “Properties” or by visiting this link while logged into your Azure Portal: https://portal.azure.com/#blade/Microsoft_AAD_IAM/ActiveDirectoryMenuBlade/Properties
Copy the Active Directory tenant ID (or Directory ID), and save it somewhere safe as you need it later.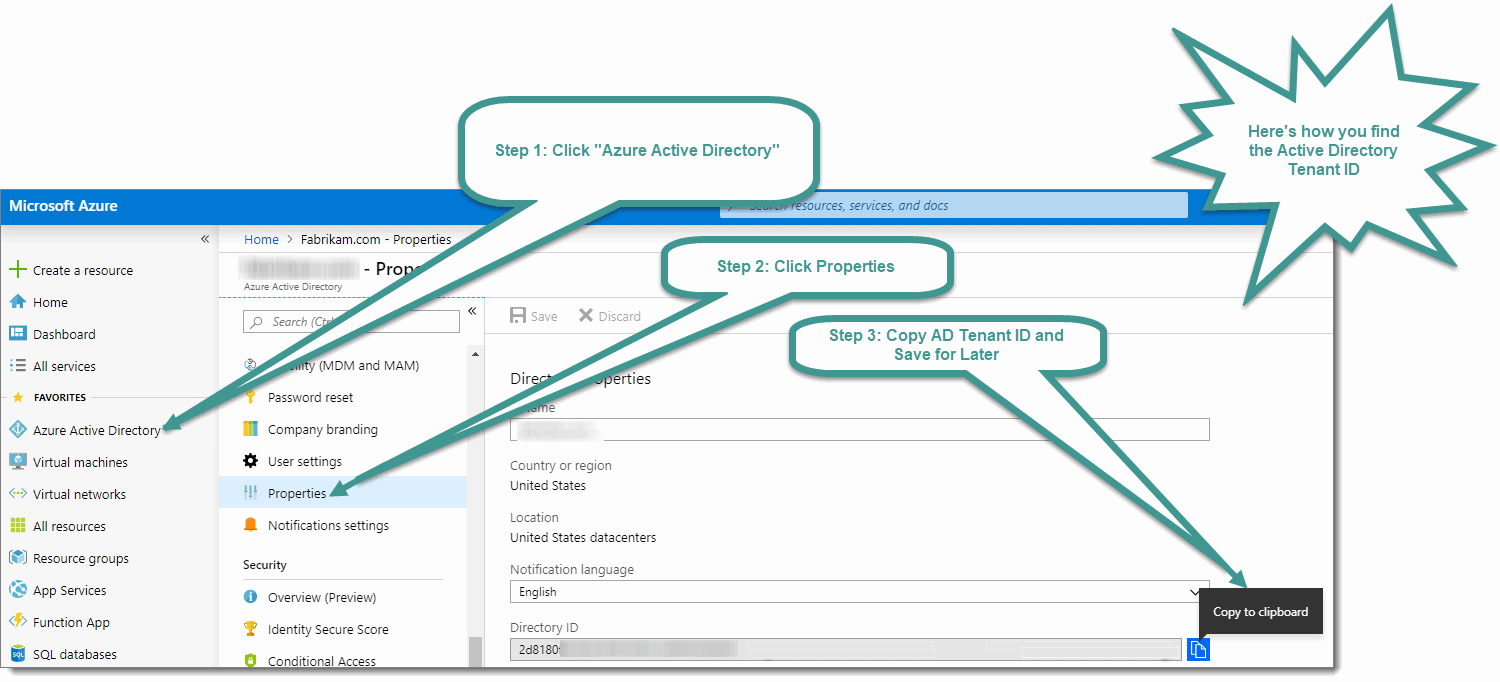
Step 1: Find Subscription ID
To find the Subscription ID, from the same Azure Portal session either use the “Search” option to search for “Subscriptions” or visit the following link while logged into your Azure Portal:
https://portal.azure.com/#blade/Microsoft_Azure_Billing/SubscriptionsBlade.
Step 2: Copy Subscription ID
Copy the Subscription ID and save it somewhere safe, as you need it later.
Configure PowerShell
Now it’s time for some PowerShell stuff (Sorry if you thought that moving to the cloud would exempt you from PowerShell). Cloud management isn’t always about pointing and clicking in GUI menus. Don’t let this intimidate you, because we’re laying out the sequential steps quickly and clearly.
Step 1: Install PowerShell Modules
First, you need to install the required modules for PowerShell. Remember, in part 2, you got prepared and downloaded the Windows Virtual Desktop cmdlets for Windows PowerShell.
Step 2: Run Commands
After you install the cmdlets, you can run some commands. You can use either PowerShell or PowerShell ISE. I recommend using PowerShell ISE as you can save/document your steps along the way. Whichever one you choose, open it with an elevated prompt, and type the following cmdlets in the order shown.
Set-executionpolicy -executionpolicy unrestricted
Install-Module -Name Microsoft.RDInfra.RDPowerShell -Force
Import-Module -Name Microsoft.RDInfra.RDPowerShell
Install-Module -Name Az -AllowClobber -Force
Import-Module -Name Az -AllowClobber
Notes:
-
When prompted by the Set-executionpolicy cmdlets, answer “Yes” or “Yes to All” to confirm
-
You will see many packages being unzipped when initiating the Install-Module commands.
-
If you only wish to allow running scripts in this one PowerShell Session, you can use the command Set-ExecutionPolicy Bypass -scope Process -Force instead of the first line above.
-
Complete all of the remaining PowerShell steps in this lesson using the same elevated PowerShell session. If you disconnect at any point, open PowerShell once again using an elevated prompt.
Step 3: Connect to Azure
Once the required modules from the above have been successfully installed, you need to run the following cmdlet to connect to Azure.
Add-RdsAccount -DeploymentUrl "https://rdbroker.wvd.microsoft.com"
That command opens up a Windows popup in which you type in the credentials of your Tenant Creator account.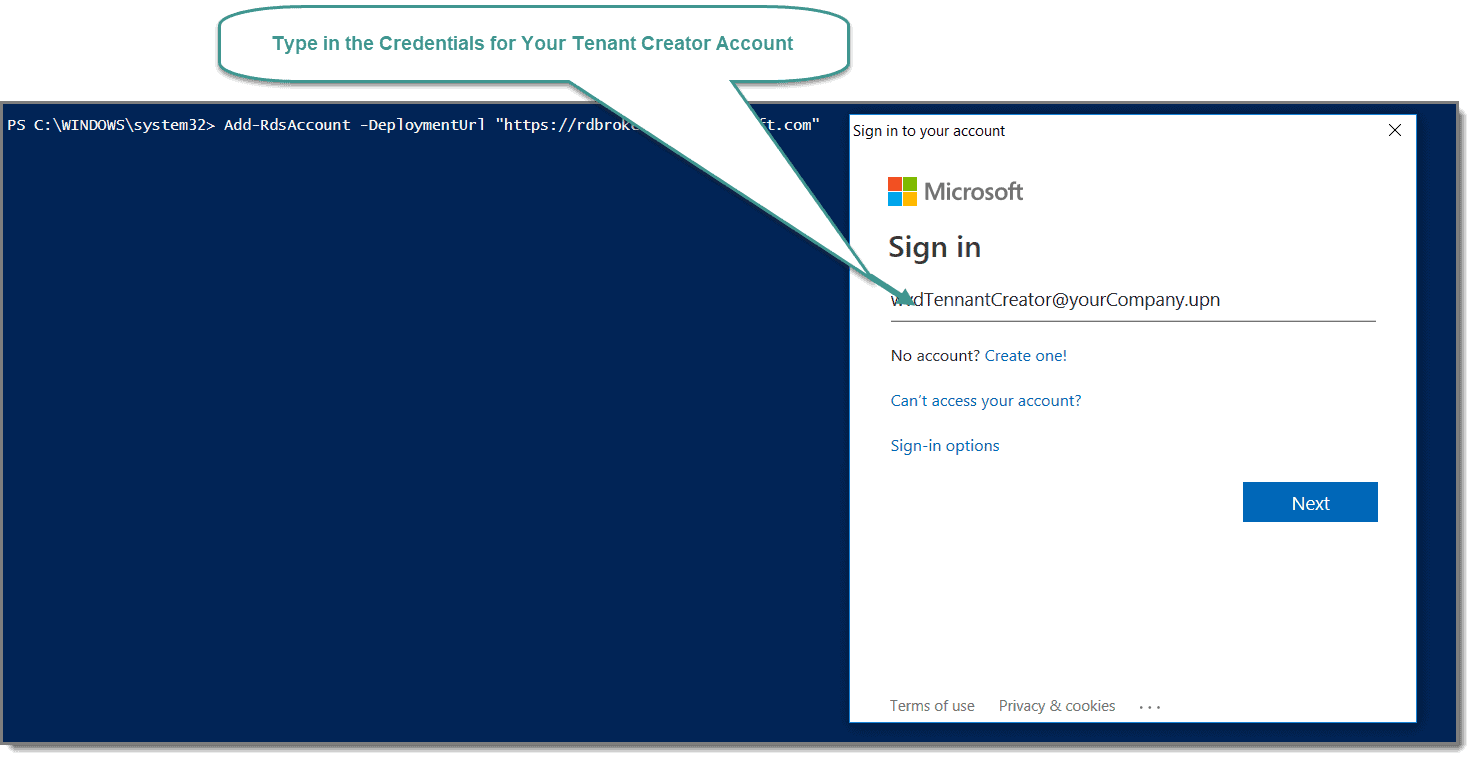
Setting Up Windows Virtual Desktop Tenant
Step 1: How to Create Windows Virtual Desktop Tenant
Now it’s time to run a command to create your Windows Virtual Desktop tenant. You need to use the Active Directory tenant ID (or Directory ID), and Subscription ID you saved earlier. The RDSTenant name should be the name of the tenant you are creating, the AadTenantId string should match the tenant Id string from your Azure portal, and the AzureSubscriptionId string should match the Subscription Id string from your Azure portal.
For Example:
New-RdsTenant -Name CompanyWVDtenant -AadTenantId a1b2c3abaa-6f7a-bc3d4-b95c-a1b2c3d4 -AzureSubscriptionId a1b2c3d4-5bef-1234-abcd-a1b2c3abaa
Note: The entire command should be on one line. You can copy and paste the command above into NotePad and then edit accordingly.
Any time you see “CompanyWVDtenant” in a script, you need to change this value to the correct name of your tenant. I am just using this value for this example.
Once you issue the command, you will see something like this:
Step 2: RDS Owner
Note:
You can use the TenantCreator account from the steps above or choose a different user account if you like, and “-TenantGroupName” is ALWAYS “Default Tenant Group.” Once again, the entire command should be on one line.
For example:
New-RdsRoleAssignment -RoleDefinitionName "RDS Owner" -UserPrincipalName wvdTenantCreator@yourCompany.upn -TenantGroupName "Default Tenant Group" -TenantName CompanyWVDtenant
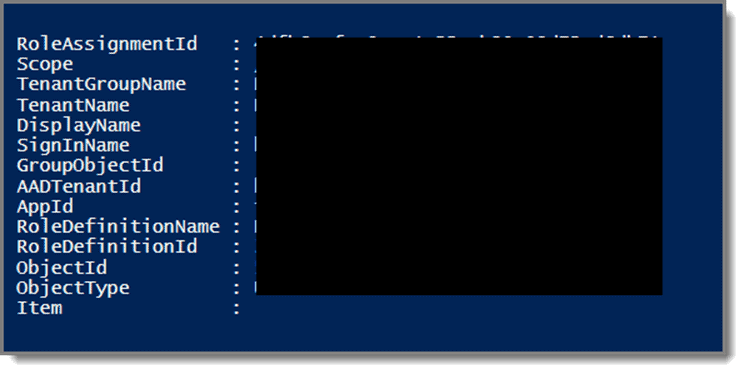
After hitting Enter, you will see something like this.
Step 3: Create Your Host Pools
Host pools are collections of one or more virtual machines. The machines are identical.
In my example, I will create two host pools. One for the “Desktop Application Group” and a second one for the “Remote Application Group”.
To keep things simple, host pool1 will only have full desktops, and host pool2 will only have published applications. To create the host pools, run the following cmdlets after changing “CompanyWVDtenant” to the correct tenant name for your organization.
Note that the commands are on two separate lines.
New-RdsHostPool -TenantName CompanyWVDtenant -name “WVD-Host-Pool01"
New-RdsHostPool -TenantName CompanyWVDtenant -name “WVD-Host-Pool02"
Step 4: Create Desktop and Remote Application Groups
Run the cmdlets below to create the “Desktop Application Group on host pool1, and “Remote Application Group” on host pool2.
Once again, change “CompanyWVDtenant” to the correct tenant name for your organization.
New-RdsAppGroup -TenantName CompanyWVDtenant -HostPoolName WVD-Host-Pool01 -AppGroupName “Desktop Application Group”
New-RdsAppGroup -TenantName CompanyWVDtenant -HostPoolName WVD-Host-Pool02 -AppGroupName “Remote Application Group”
Comments
0 comments
Please sign in to leave a comment.