Azure Files is Microsoft's easy-to-use cloud file system. Azure file shares can be seamlessly used in Windows and Windows Server. This article discusses the considerations for using an Azure file share with Windows and Windows Server.
In order to use an Azure file share via the public endpoint outside of the Azure region it is hosted in, such as on-premises or in a different Azure region, the OS must support SMB 3.x. Older versions of Windows that support only SMB 2.1 cannot mount Azure file shares via the public endpoint.
Prerequisites
Ensure port 445 is open: The SMB protocol requires TCP port 445 to be open; connections will fail if port 445 is blocked. You can check if your firewall is blocking port 445 with the Test-NetConnection cmdlet. To learn about ways to work around a blocked 445 port, see the Cause 1: Port 445 is blocked section of our Windows troubleshooting guide.
Mount the Azure file share
To use an Azure file share with Windows, you must either mount it, which means assigning it a drive letter or mount point path, or access it via its UNC path.
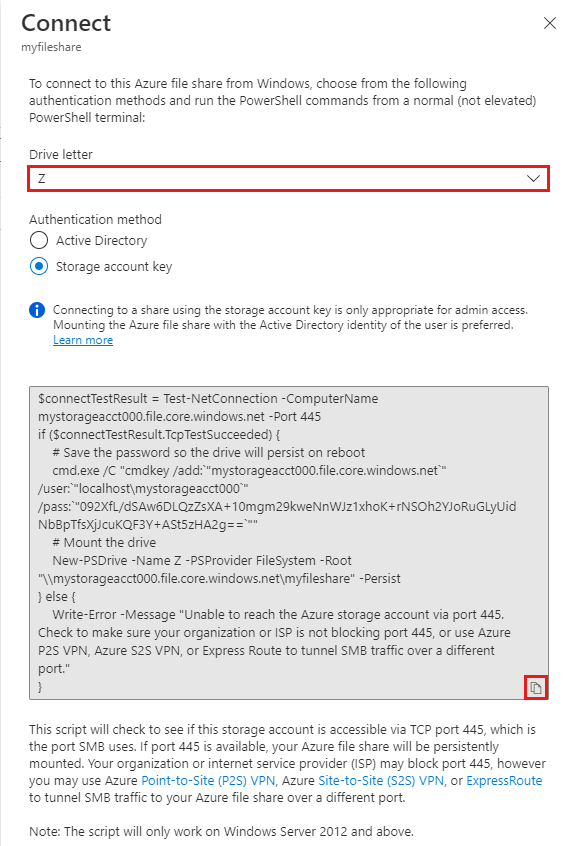
The Azure portal provides you with a script that you can use to mount your file share directly to a host. We recommend using this provided script.
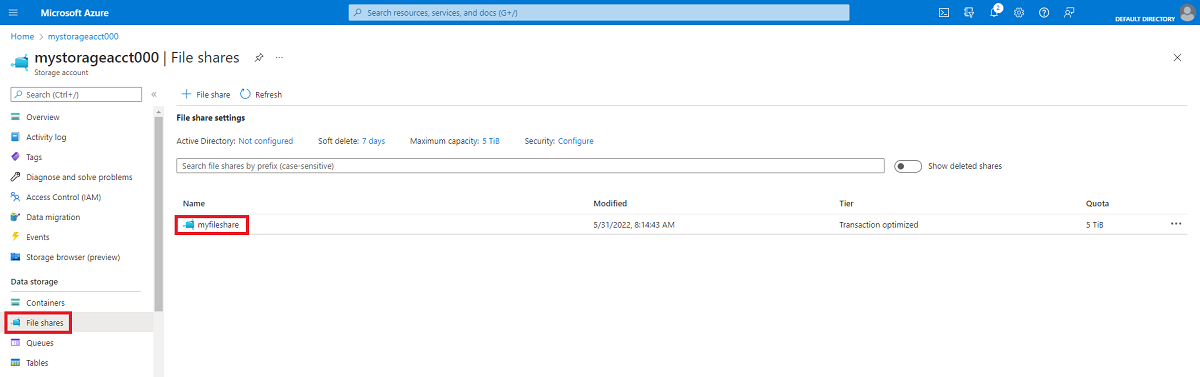
To get this script:
-
Sign in to the Azure portal.
-
Navigate to the storage account that contains the file share you'd like to mount.
-
Select File shares.
-
Select the file share you'd like to mount.
-
Select Connect.

-
Select the drive letter to mount the share to.
-
Copy the provided script.
-
Paste the script into a shell on the host you'd like to mount the file share to, and run it.
You have now mounted your Azure file share.
Mount the Azure file share with File Explorer
-
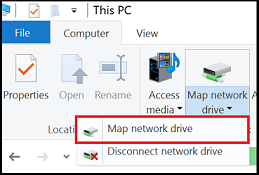
Open File Explorer. This can be done by opening from the Start Menu, or by pressing Win+E shortcut.
-
Navigate to This PC on the left-hand side of the window. This will change the menus available in the ribbon. Under the Computer menu, select Map network drive.
-
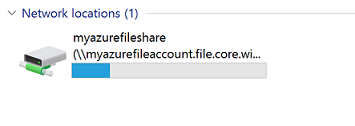
Select the drive letter and enter the UNC path, the UNC path format is
\\<storageAccountName>.file.core.windows.net\<fileShareName>. For example:\\anexampleaccountname.file.core.windows.net\example-share-name.
-
Use the storage account name prepended with
AZURE\as the username and a storage account key as the password.
-
Use Azure file share as desired.
-
When you are ready to dismount the Azure file share, you can do so by right-clicking on the entry for the share under the Network locations in File Explorer and selecting Disconnect.
Reference: https://docs.microsoft.com/en-us/azure/storage/files/storage-how-to-use-files-windows
Comments
0 comments
Please sign in to leave a comment.