Azure enables you to create and manage support requests, also known as support tickets. You can create and manage requests in the Azure portal, which is covered in this article. You can also create and manage requests programmatically, using the Azure support ticket REST API, or by using Azure CLI.
Note
The Azure portal URL is specific to the Azure cloud where your organization is deployed.
- Azure portal for commercial use is: https://portal.azure.com
- Azure portal for Germany is: https://portal.microsoftazure.de
- Azure portal for the United States government is: https://portal.azure.us
Azure provides unlimited support for subscription management, which includes billing, quota adjustments, and account transfers. For technical support, you need a support plan. For more information, see Compare support plans.
Getting started
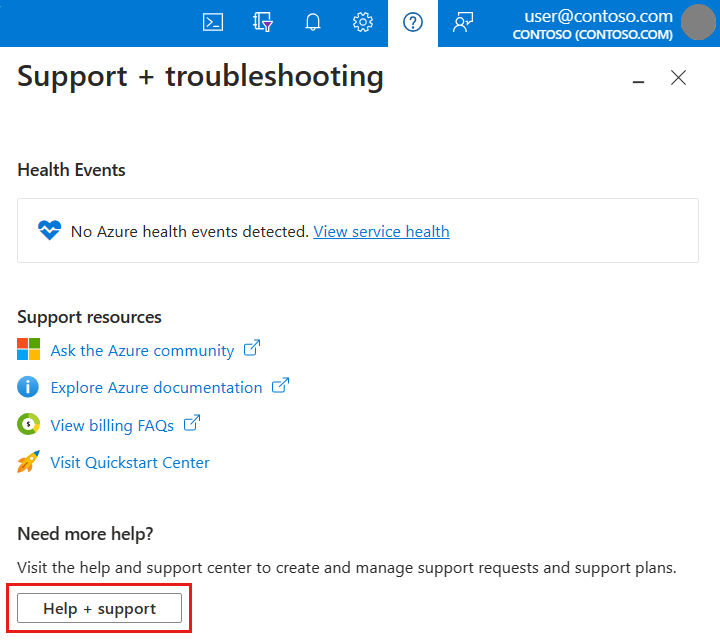
You can get to Help + support in the Azure portal. It's available from the Azure portal menu, the global header, or the resource menu for a service. Before you can file a support request, you must have appropriate permissions.
Azure role-based access control
To create a support request, you must be an Owner, Contributor or be assigned to the Support Request Contributor role at the subscription level. To create a support request without a subscription, for example an Azure Active Directory scenario, you must be an Admin.
Go to Help + support from the global header
To start a support request from anywhere in the Azure portal:
-
Select the ? in the global header, then select Help + support.
-
Select Create a support request. Follow the prompts to provide information about your problem. We'll suggest some possible solutions, gather details about the issue, and help you submit and track the support request.

Go to Help + support from a resource menu
To start a support request in the context of the resource you're currently working with:
-
From the resource menu, in the Support + troubleshooting section, select New Support Request.

-
Follow the prompts to provide us with information about the problem you're having. When you start the support request process from a resource, some options are pre-selected for you.
Create a support request
We'll walk you through some steps to gather information about your problem and help you solve it. Each step is described in the following sections.
Problem description
The first step of the support request process is to select an issue type. You'll then be prompted for more information, which can vary depending on what type of issue you selected. In most cases, you'll need to specify a subscription, briefly describe your issue, and select a problem type. If you select Technical, you'll need to specify the service that your issue relates to. Depending on the service, you'll see additional options for Problem type and Problem subtype.
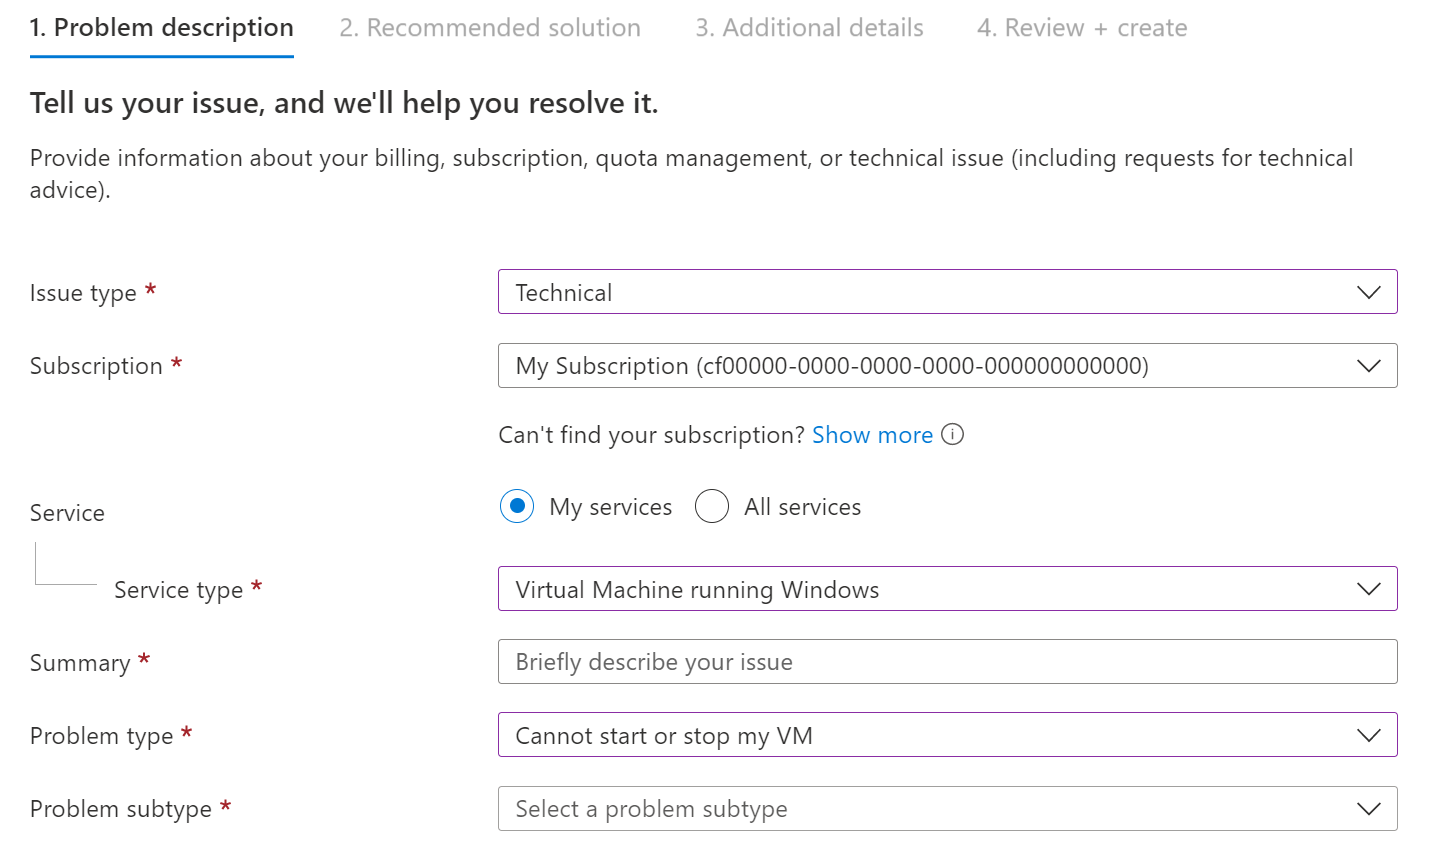
Once you've provided all of these details, select Next.
Recommended solution
Based on the information you provided, we'll show you recommended solutions you can use to try and resolve the problem. In some cases, we may even run a quick diagnostic. Solutions are written by Azure engineers and will solve most common problems.
If you're still unable to resolve the issue, continue creating your support request by selecting Next.
Additional details
Next, we collect additional details about the problem. Providing thorough and detailed information in this step helps us route your support request to the right engineer.
-
Complete the problem details so that we have more information about your issue. If possible, tell us when the problem started and any steps to reproduce it. You can upload a file, such as a log file or output from diagnostics. For more information on file uploads, see File upload guidelines.
-
In the Share diagnostic information section, select Yes or No. Selecting Yes allows Azure support to gather diagnostic information from your Azure resources. If you prefer not to share this information, select No. In some cases, there will be additional options to choose from, such as whether to allow access to a virtual machine's memory.
-
In the Support method section, select the severity of impact. The maximum severity level depends on your support plan.
-
Provide your preferred contact method, your availability, and your preferred support language.
-
Next, complete the Contact info section so we know how to contact you.
Select Next when you've completed all of the necessary information.
Review + create
Before you create your request, review all of the details that you'll send to support. You can select Previous to return to any tab if you need to make changes. When you're satisfied the support request is complete, select Create.
A support engineer will contact you using the method you indicated. For information about initial response times, see Support scope and responsiveness.
For the Official Microsoft link
https://docs.microsoft.com/en-us/azure/azure-portal/supportability/how-to-create-azure-support-request
Comments
0 comments
Please sign in to leave a comment.