You can add the SLA timer control only in the classic PowerApps experience.
-
In your Dynamics 365 environment, select Advanced Settings to go to Customizations.
-
Select Customize the System, and in the Solutions page, expand Entities under Components.
-
Select the entity for which you want to add the SLA Timer control, and in the Forms view, select the corresponding form. In this example, let us select the Case entity, and the Case for interactive experience form.
-
On the page that appears, on the Insert tab, insert a section, and then insert a subgrid.
-
Double-click the subgrid, and on the Set Properties dialog box, enter the necessary details.
- In the Data Source area, in Default View, you can add a view or edit an existing view to determine the SLA KPIs that should be displayed for agents at runtime. For information on views, see Create and edit views.

-
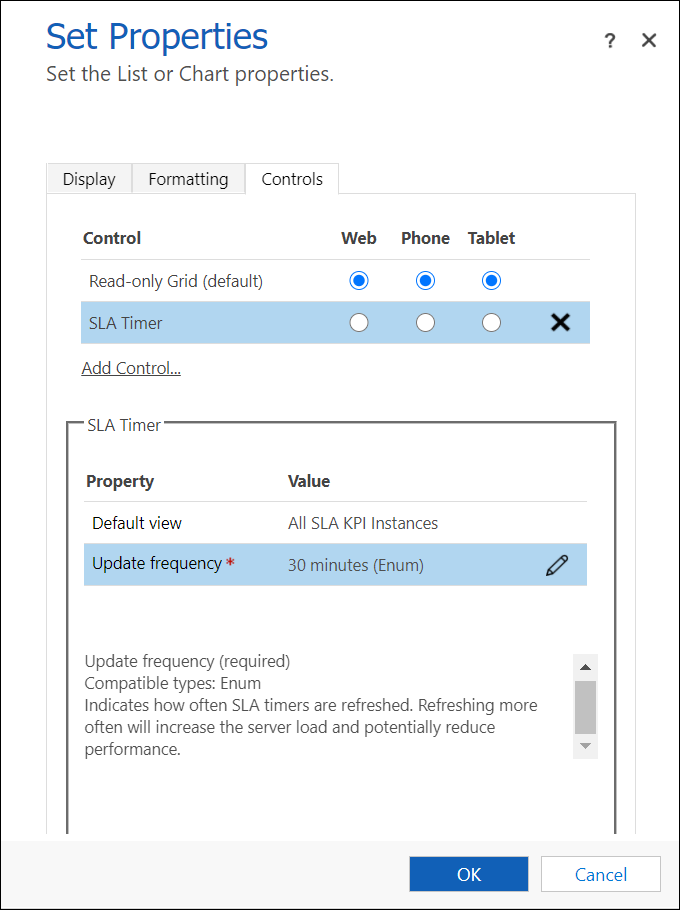
On the Controls tab, enter the following information:
- Select Add Control, and choose SLA Timer.
- In the SLA Timer area, enter a value for Update_Frequency_key to set the timer refresh interval. For optimal performance, choose an interval that is not too short. The default interval is 30 minutes.
-
Save and publish the solution.
Comments
0 comments
Please sign in to leave a comment.