
User Account Control (UAC) is a security feature in Microsoft Windows designed to prevent unauthorized changes to the operating system. It ensures that any action requiring administrator-level permissions prompts the user for approval, helping protect the system from malicious software and unintended modifications.
Most of the time, this control has to be activated to secure your operative system an be away for changes from another user's account in the same device and restrict any other permission. But sometimes maybe you will be in the situation where has to be disabled.
This feature is present in most of the Microsoft Windows' versions. The following instructions are accurate for Microsoft Windows 7, 8, 10 and 11.
You can disable the UAC with the following options:
Disabling the UAC through the Control Panel settings (Basic)
Step 1: Type control panel in the search bar of Windows 10 and click this app in the result to open it.
Step 2: Go to User Accounts > Change User Account Control settings.
Step 3: Drag the slider control to Never notify and click OK to apply the change.
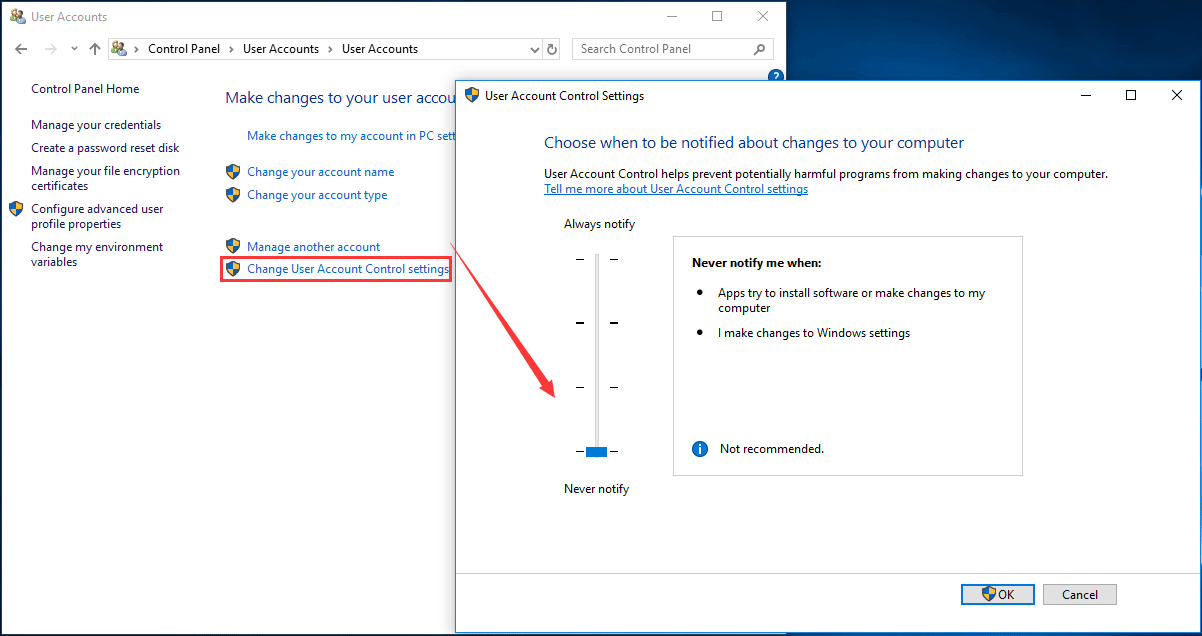
This way, the UAC is disabled and you won’t receive any notification. But this won’t completely disable User Account Control that is still active in the background.
You can disable the UAC with the Command Line Interface (CMD) of your operative system (Intermediate)
Step 1: Run Command Prompt as administrator.
Step 2: To turn off UAC enter the following command and press Enter:
reg.exe ADD HKLM\SOFTWARE\Microsoft\Windows\CurrentVersion\Policies\System /v EnableLUA /t REG_DWORD /d 0 /f.
Screen capture reference for Windows 10:
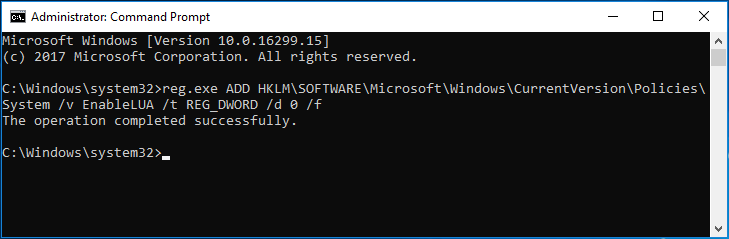
Step 3: Reboot your computer to let the change take effect.
Check the Group Policies into the system and disable from there (intermediate)
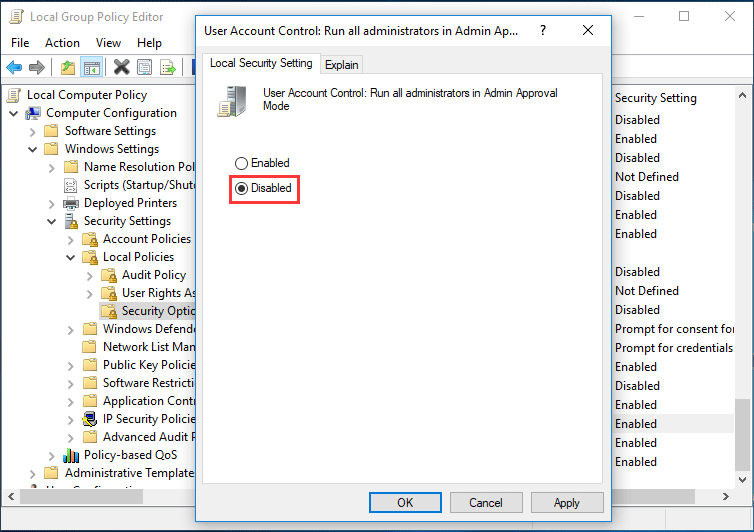
Step 1: Input Policy Editor in the Windows 10 search box and click Edit group policy.
Step 2: Go to Computer Configuration > Windows Settings > Security Settings > Local Policies > Security Options.
Step 3: Scroll down to the bottom to find User Account Control: Run all administrators in Admin Approval Mode and double-click on it, choose Disabled and click OK.
Disable UAC from the Registry Key Entries or the REGEDIT (advanced)
Step 1: Press Win+ R keys to launch the Run dialog.
Step 2: Input regedit.exe and click OK.
Step 3: Go to the path:
HKEY_LOCAL_MACHINE\SOFTWARE\Microsoft\Windows\CurrentVersion\Policies\System
Step 4: Double-click on the key EnableLUA and change its Value data to 0.
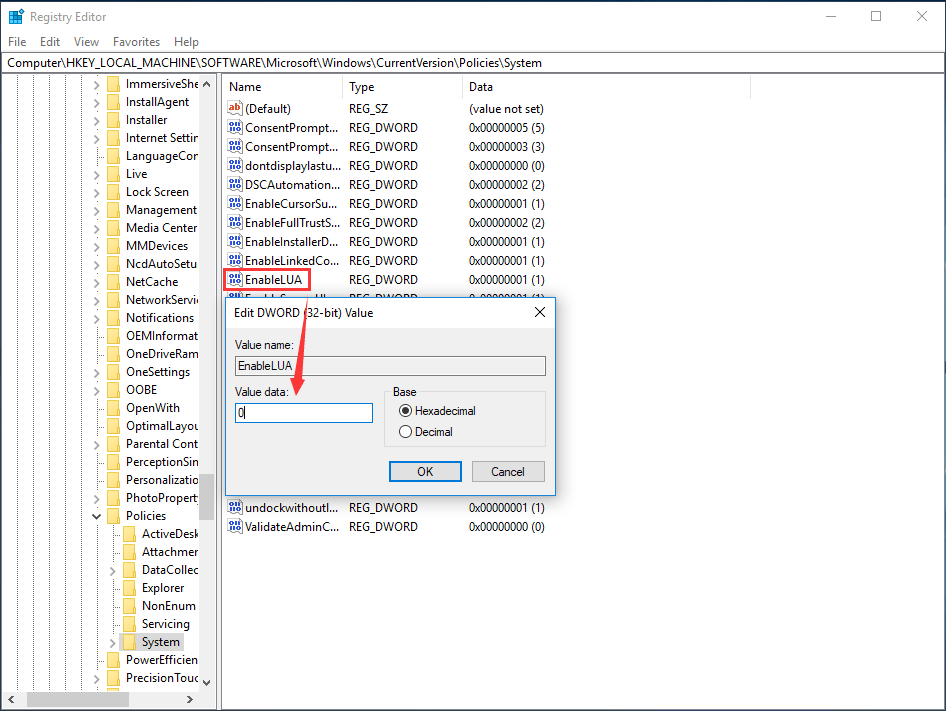
Step 5: Save the change and restart your computer.
Now, we have shown you how to disable UAC inside Microsoft Windows in detail. In addition, you may want to set UAC to automatically deny elevation requests from users with standard-level credentials to avoid being prompted to enter administrator credentials to confirm all the time when running a program requiring elevated permissions.
Also, know about how to automatically deny UAC elevation requests
You can do this work via Windows Registry or Group Policy.
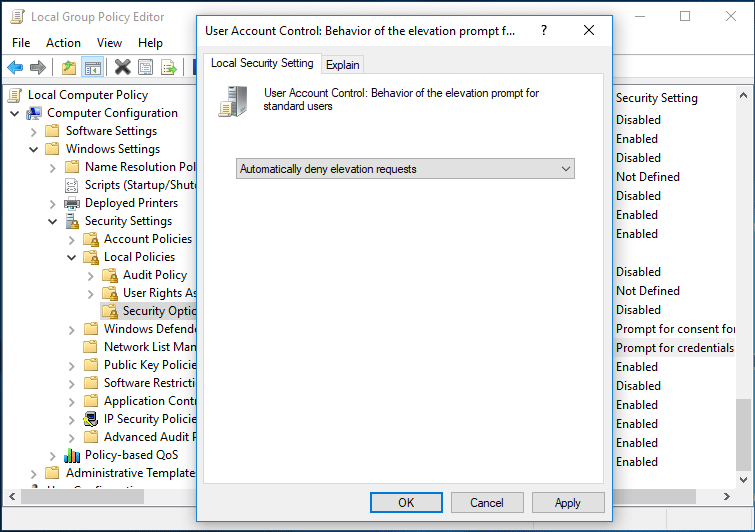
In Group Policy, go to Computer Configuration/Windows Settings/Security Settings/Local Policies/Security Options, double-click on User Account Control: Behavior of the elevation prompt for standard users and choose Automatically Deny elevation requests.
In the Registry Editor window, navigate to HKEY_LOCAL_MACHINE\SOFTWARE\Microsoft\Windows\CurrentVersion\Policies\System, double-click the ConsentPromptBehaviorUser key and change its Value data to 0 so that you can automatically deny UAC elevation requests.

This is all you have to know and how to avoid some actions and features of the User Access Control. Do these instructions with the right permission from administrators and remember back up your OS status to avoid any other problem.
Comments
0 comments
Please sign in to leave a comment.